Cabinet Refinishing Sacramento can completely refresh the appearance of a kitchen, bathroom, laundry room, or other space without requiring full cabinet replacement. However, the quality and durability of the finished surface depend heavily on what happens before the new coating or finish is applied. Grease, dirt, damaged surfaces, glossy coatings, and leftover hardware can interfere with adhesion and leave the final result looking uneven.
Proper preparation creates a clean, stable surface that allows refinishing materials to perform as intended. Understanding how to prepare cabinets for refinishing can help homeowners achieve a smoother appearance, improve durability, and avoid many common problems that occur when preparation is rushed.
Why Is Cabinet Preparation So Important?
Preparation is one of the most important stages of any cabinet refinishing project because new coatings need a suitable surface to adhere properly. Kitchen cabinets in particular can accumulate cooking grease, fingerprints, dust, cleaning-product residue, and other contaminants over many years. Applying a new finish directly over these materials may result in peeling, bubbling, uneven coverage, or premature wear. Even cabinets that appear relatively clean can contain invisible residues that affect adhesion. Thorough preparation gives the new finish the best opportunity to bond correctly.
Proper preparation also helps create a more professional-looking result. Scratches, dents, old hardware holes, damaged edges, and other imperfections may become more noticeable after a fresh finish is applied. Identifying and repairing these problems beforehand creates a more uniform surface. Preparation also provides an opportunity to inspect cabinet doors, drawer fronts, frames, and hardware for damage. Spending additional time at this stage can prevent much more difficult corrections later.
How Should You Inspect Cabinets Before Refinishing?
The first step is evaluating the overall condition of the cabinets. Doors and drawer fronts should be inspected for cracks, loose joints, water damage, peeling surfaces, deep scratches, and other deterioration. Cabinet frames should also be examined carefully, particularly around sinks and other areas where moisture exposure is common. Minor cosmetic damage can often be repaired during preparation. More significant structural deterioration may need to be corrected before refinishing is considered.
The existing cabinet material and finish should also be identified whenever possible. Solid wood, wood veneer, medium-density fiberboard, laminate, and other manufactured materials do not always require identical preparation techniques. Similarly, previously painted cabinets may need different treatment from stained or factory-finished surfaces. Understanding what you are working with helps determine the appropriate cleaning, sanding, priming, and refinishing approach. Testing products on an inconspicuous area can be useful when the existing finish is uncertain.
How Do You Remove Doors, Drawers, and Hardware?
Removing cabinet doors and drawer fronts makes it easier to prepare every visible surface consistently. Hinges, knobs, pulls, and other removable hardware should generally be taken off rather than worked around. This provides better access to edges and corners while preventing paint, stain, or other finishing materials from covering the hardware. Doors can then be placed on a suitable work surface for cleaning, repairs, and sanding. Organized disassembly makes the later refinishing stages much easier.
Labeling components is particularly important when working with a large number of cabinets. Doors, drawers, hinges, and related hardware can be marked according to their original locations so they return to the correct openings during reassembly. Hardware can be stored in labeled containers or bags to prevent small components from being lost. Taking reference photographs before disassembly can also simplify the installation process later. A few minutes of organization can prevent considerable frustration at the end of the project.
How Should Cabinets Be Cleaned Before Refinishing?
Cabinet surfaces should be cleaned thoroughly before sanding begins. This is especially important in kitchens, where airborne grease can settle on doors, frames, and areas near cooking appliances. An appropriate cleaner or degreasing product can help remove oils, food residue, fingerprints, and accumulated grime. Cleaning should include edges, corners, molding, and recessed details rather than focusing only on large flat surfaces. Refinishing over contamination can lead to adhesion problems even when the rest of the preparation is completed correctly.
After cleaning, any remaining cleaning residue should be removed according to the product instructions, and the cabinets should be allowed to dry completely. Sanding damp or greasy surfaces can spread contaminants rather than removing them effectively. Clean surfaces are also easier to inspect for scratches and damage that may have been hidden beneath dirt. If areas still feel greasy or look contaminated after the first cleaning, additional cleaning may be necessary. Starting with a truly clean surface improves every stage that follows.
How Do You Repair Cabinet Damage Before Refinishing?
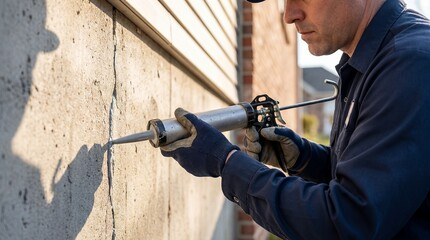
Minor cabinet damage should be corrected before sanding and finishing. Small dents, scratches, unwanted hardware holes, and other surface imperfections may be filled with a repair material suitable for the cabinet substrate and intended finish. Loose joints or trim pieces should also be secured before cosmetic refinishing begins. Repairs need enough time to cure properly before they are sanded smooth. Rushing this stage can leave visible imperfections beneath the final coating.
Water-damaged or deteriorated material deserves closer attention because refinishing cannot correct structural problems by itself. Swollen engineered wood, delaminating veneer, severely damaged edges, or deteriorated cabinet components may require more extensive repair or replacement. Applying a fresh finish over unstable material only hides the problem temporarily. The underlying surface needs to be sound before refinishing begins. Proper evaluation prevents homeowners from investing time and materials in surfaces that are not suitable for refinishing.
Why Is Sanding Important for Cabinet Refinishing?
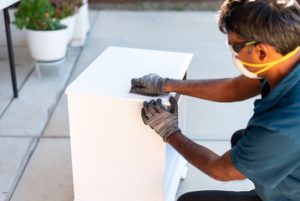
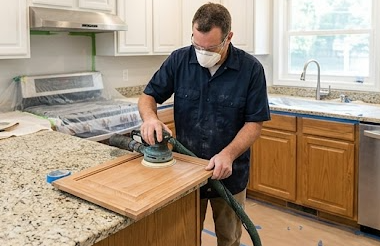
Sanding helps create a surface that is smoother and more receptive to the new coating system. Many existing cabinet finishes are hard and glossy, which can make it difficult for primers or new finishes to adhere properly. Light sanding or deglossing reduces this slick surface while also smoothing minor imperfections and repaired areas. The objective is generally to prepare the surface appropriately rather than automatically removing every trace of the existing finish. The exact approach depends on the cabinet material and the refinishing system being used.
Care should be taken around edges, profiles, veneers, and decorative details because aggressive sanding can damage them. Thin veneers are particularly vulnerable because sanding through the top layer can create permanent visible damage. After sanding, dust should be removed thoroughly from doors, drawer fronts, frames, corners, and surrounding work areas. Remaining dust can become trapped beneath primer or finish and create a rough surface. Cleanliness after sanding is just as important as the sanding itself.
Should Cabinets Be Primed Before Refinishing?
Primer is commonly used when cabinets are being painted because it can improve adhesion and create a more consistent base for the finish coats. It may also help block discoloration, tannins, or previous colors from affecting the final appearance. The correct primer depends on the cabinet substrate, existing finish, and coating that will be applied afterward. Using incompatible products can create adhesion or appearance problems. Following the refinishing system’s product recommendations is therefore important.
Primer application also provides another opportunity to identify imperfections. Once a uniform primer coat is present, scratches, dents, rough repairs, and uneven sanding may become easier to see. These areas can often be corrected before the final coats are applied. Light sanding between appropriate stages may further improve smoothness when recommended by the product manufacturer. Careful attention during priming contributes significantly to a polished final appearance.
How Should the Work Area Be Prepared?
Cabinet refinishing can create dust, fumes, and overspray depending on the products and application methods being used. Countertops, appliances, floors, walls, backsplashes, and nearby furniture should be protected before work begins. Areas that are not being refinished can be masked carefully to create clean boundaries. Adequate ventilation should also be provided according to the requirements of the cleaning, priming, and finishing products. Good workspace preparation helps protect the rest of the home.
Dust control is especially important because airborne particles can settle onto wet coatings and affect the final surface. Sanding should be completed and the area cleaned thoroughly before finish application begins. Doors and drawer fronts should be positioned in a clean workspace where they can dry or cure without being touched unnecessarily. Maintaining an organized environment reduces accidental damage throughout the project. Professional-looking cabinet refinishing depends as much on workspace control as it does on application technique.
What Common Cabinet Preparation Mistakes Should You Avoid?
One of the biggest mistakes is skipping or rushing the cleaning stage. Sanding greasy cabinets can push contamination into the surface and make proper adhesion more difficult. Another common mistake is applying new coatings over glossy finishes without the preparation required by the chosen refinishing system. Failing to remove sanding dust can also create roughness and visible imperfections. Each preparation stage has a specific purpose and should not be treated as optional.
Homeowners should also avoid assuming that every cabinet material can be prepared in exactly the same way. Aggressive sanding that works on certain solid-wood surfaces may permanently damage thin veneers or some manufactured finishes. Incorrect primers and coatings can also cause compatibility problems. When the existing cabinet material or finish is uncertain, professional evaluation may help prevent expensive mistakes. Choosing the correct preparation method is essential for achieving durable results.
Final Thoughts
Learning how to prepare cabinets for refinishing is essential for achieving a smooth, attractive, and durable result. Successful preparation begins with inspecting the cabinets, removing and organizing doors and hardware, thoroughly cleaning the surfaces, repairing damage, sanding appropriately, and preparing the work area. Depending on the chosen finish, proper priming may also be an important part of creating a stable foundation for the final coating. Although preparation can take considerable time, rushing these steps often leads to peeling, uneven surfaces, and premature wear. Careful cabinet preparation helps ensure that the refinishing work looks better and continues performing well long after the project is completed.