Cabinets play a central role in the functionality and visual appeal of kitchens, bathrooms, and storage areas. Over time, even well-constructed cabinetry begins to show signs of everyday use. Small scratches, dents, chips, loose joints, worn edges, and minor water stains are all common forms of wear that accumulate gradually. While these imperfections may seem insignificant at first, they become much more noticeable once a refinishing project begins. Any flaws left untreated can affect the final appearance and durability of the new finish.
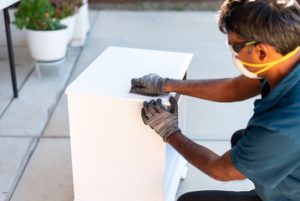
Before applying paint, stain, or protective coatings, it is essential to properly repair minor cabinet damage. Refinishing does not simply hide imperfections; it highlights them if the surface beneath is uneven or unstable. Proper preparation ensures that the final result is smooth, durable, and visually consistent. Fixing minor damage beforehand is one of the most important steps in achieving professional-quality Cabinet Refinishing Modesto results without needing full cabinet replacement.
Understanding how to identify, repair, and prepare cabinets before refinishing helps ensure long-lasting improvements and a more polished final appearance.
Why Repairing Cabinet Damage Before Refinishing Matters
Refinishing is designed to improve appearance and protect cabinet surfaces, but it cannot correct structural flaws or surface damage on its own. If dents, scratches, or loose components are left untreated, they often become more visible after new finishes are applied. Paint and stain tend to highlight surface irregularities rather than conceal them.
Additionally, damaged areas can compromise adhesion. Paint or stain may not bond properly to uneven, cracked, or contaminated surfaces, which increases the risk of peeling, bubbling, or premature wear.
Proper repair before refinishing ensures:
- A smooth and even surface for finishing.
- Improved adhesion of paint or stain.
- Enhanced durability of the final coating.
- Better visual consistency across all cabinets.
- Reduced risk of future surface failure.
Taking the time to address small issues early creates a stronger foundation for the entire refinishing process.
Identifying Common Minor Cabinet Damages
Before beginning repairs, it is important to understand what types of damage are typically found on cabinets. These imperfections often develop gradually through regular use, cleaning, and environmental exposure.
Common minor cabinet damages include:
- Surface scratches from daily use or cleaning tools.
- Small dents or pressure marks from impact.
- Chipped edges along doors and drawer fronts.
- Loose joints or weakened connections.
- Faded or worn finish areas.
- Minor water stains or discoloration.
- Small holes from old hardware adjustments.
Each of these issues requires a slightly different approach, but all should be addressed before refinishing begins.
Cleaning the Surface Before Any Repairs
Before attempting any repair work, cabinets must be thoroughly cleaned. Over time, surfaces accumulate grease, dust, cooking residue, and cleaning product buildup. If not removed, these contaminants can interfere with repair materials such as fillers, adhesives, and primers.
A clean surface ensures that repair compounds bond properly and that sanding is more effective. Cleaning also helps reveal hidden damage that may not be visible under layers of grime.
A proper cleaning process typically includes:
- Removing loose dust and debris.
- Using a mild degreasing solution to eliminate oils.
- Wiping surfaces with a damp cloth.
- Allowing full drying before proceeding.
Skipping this step often leads to poor adhesion and uneven repair results.
Repairing Scratches and Surface Scuffs
Scratches are among the most common cabinet imperfections. They often appear due to daily handling, cleaning tools, or contact with objects stored nearby. While minor scratches may seem purely cosmetic, they can become more noticeable after refinishing if not addressed.
Light scratches can often be corrected through sanding and surface smoothing, while deeper scratches may require filler products.
Repair steps include:
- Lightly sand the scratched area to smooth the edges.
- Applying wood filler for deeper grooves.
- Allow the filler to dry completely.
- Sanding again to create a level surface.
- Blending the repaired area with the surrounding material.
Proper scratch repair ensures a uniform finish after painting or staining.
Fixing Dents and Pressure Marks
Dents occur when cabinet surfaces are impacted by force, such as dropped objects or repeated pressure. While some dents are shallow and cosmetic, others may compress the material fibers and require restoration techniques.
In many cases, minor dents in wood can be improved using moisture and heat to help raise compressed fibers. For deeper dents, filler may be necessary.
Common dent repair methods include:
- Applying controlled moisture and heat to raise fibers.
- Sanding the area once it has stabilized.
- Filling deeper indentations with wood filler.
- Leveling the surface through sanding.
Proper dent repair helps restore a smooth, consistent surface essential for refinishing.
Repairing Chipped Edges and Corners
Edges and corners of cabinets are especially vulnerable to chipping due to frequent contact and impact. These damaged areas are often highly visible and can significantly affect the appearance of refinished cabinets if not addressed.
Chipped edges require careful rebuilding to restore both shape and stability.
Repair techniques include:
- Cleaning and smoothing the damaged area.
- Applying wood filler or epoxy compound.
- Reconstructing missing edge sections.
- Shaping and sanding once dry.
- Ensuring symmetry with the surrounding edges.
Well-repaired edges help maintain clean lines and a professional finish after refinishing.
Tightening Loose Joints and Structural Connections
Although refinishing primarily focuses on surface appearance, structural stability is equally important. Loose joints or weakened connections can lead to misalignment, uneven surfaces, or long-term cabinet instability.
Before refinishing, all cabinet components should be checked for tightness and strength.
Steps to address loose joints include:
- Identifying areas with movement or instability.
- Tightening screws or fasteners.
- Reinforcing joints with wood adhesive if needed.
- Allowing proper curing time for adhesives.
- Checking alignment after repairs.
Stable structures ensure that refinishing results remain durable over time.
Addressing Minor Water Damage
Water exposure is a common issue in kitchen and bathroom cabinets. Even small amounts of moisture can cause discoloration, swelling, or softening of cabinet surfaces. If left untreated, these areas may continue to deteriorate beneath new finishes.
Minor water damage can often be repaired if caught early.
The repair approach includes:
- Drying affected areas completely.
- Removing softened or damaged material.
- Sanding swollen sections smooth.
- Applying filler to restore uniformity.
- Sealing the area to prevent future moisture penetration.
Proper treatment of water-damaged sections is critical for long-term refinishing success.
Filling Holes and Hardware Adjustments
Cabinets often have small holes from previous hardware installations or adjustments. These holes must be filled before refinishing to create a smooth and continuous surface.
Leaving holes unfilled can result in visible imperfections after painting or staining.
Repair steps include:
- Cleaning and preparing the hole edges.
- Filling holes with wood filler or putty.
- Allow the material to dry completely.
- Sanding flush with the surrounding surface.
- Checking for smoothness before refinishing.
This step is especially important when changing hardware layouts or updating cabinet designs.
Sanding as the Final Preparation Step
Once all minor repairs have been completed, sanding becomes the final preparation stage before refinishing. Sanding ensures that all repaired areas are smooth and fully integrated with the original surface.
It also creates a slightly textured surface that improves paint or stain adhesion.
Key sanding practices include:
- Using appropriate grit levels for surface smoothing.
- Sanding all repaired areas evenly.
- Blending transitions between old and new material.
- Removing sanding dust before finishing.
- Ensuring consistent surface texture.
Proper sanding is essential for achieving a professional-quality finish.
Inspecting Work Before Refinishing Begins
Before applying any new finish, it is important to carefully inspect all repaired areas. This final review ensures that no imperfections remain and that all surfaces are properly prepared.
Inspection should include:
- Checking for smoothness across all surfaces.
- Ensuring all fillers are fully cured.
- Confirming structural stability.
- Verifying consistent surface texture.
- Removing any remaining dust or debris.
A thorough inspection helps prevent issues after refinishing begins.
Why Proper Repairs Improve Refinishing Results
Taking the time to fix minor cabinet damage before refinishing significantly improves the outcome. Properly repaired surfaces allow finishes to adhere evenly and create a smooth, consistent appearance. Without preparation, even high-quality finishes can highlight imperfections instead of concealing them.
Benefits of proper repair work include:
- Longer-lasting refinished surfaces.
- Improved aesthetic consistency.
- Better adhesion of coatings.
- Reduced risk of peeling or bubbling.
- Higher overall project quality.
Preparation is what transforms refinishing from a simple cosmetic update into a long-lasting improvement.
Fixing minor cabinet damage before refinishing is a critical step in achieving professional, durable, and visually appealing results. Small imperfections such as scratches, dents, chips, loose joints, and water stains may seem minor on their own, but they can significantly impact the final appearance if left unaddressed.
Through careful cleaning, detailed repairs, proper sanding, and thorough inspection, cabinets can be fully prepared for refinishing. This process not only enhances the final look but also improves durability and extends the lifespan of the finished surface.
When done correctly, repair work ensures that refinishing delivers its full potential—transforming worn, damaged cabinets into smooth, refreshed, and long-lasting features that enhance the entire space.