Cabinet Refinishing Basics
San Jose Cabinet Refinishing is an option that works well for those looking to make a cosmetic change. It can hide scratches, dents, and faded colors but isn’t able to fix structural or functionality issues like warped doors.
Refacing cabinets involves overlays of veneers onto existing surfaces. This allows you to completely revamp the look of your space with a new style, finish, and hardware.
Cabinet refinishing is a great way to make your home’s cabinets look new again. It can also be a cost-effective alternative to replacing them. However, before you start the process, it’s important to think about your options and consider what kind of look you want for your kitchen or bathroom. This will help you decide if your cabinets need to be refaced or refinished.
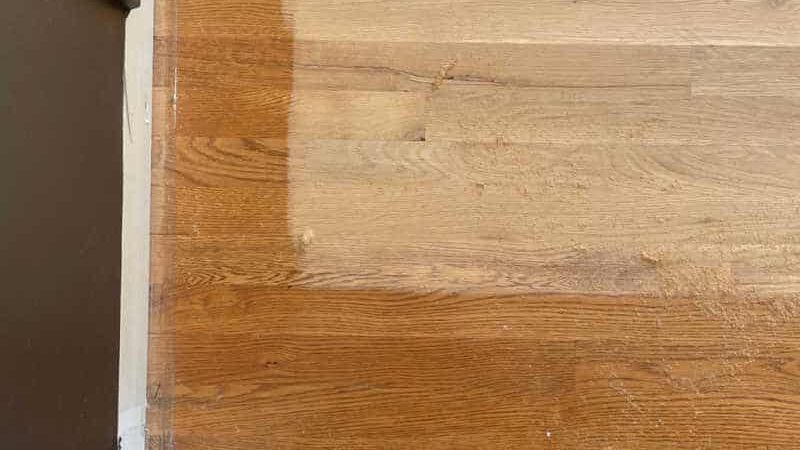
The first step in the cabinet refinishing process is to remove the existing paint and stain from the doors and drawer fronts. This is done using a chemical stripper and sanding. A pro will usually do this offsite, as the fumes and mess can be hazardous to indoor spaces. This is a time-consuming and labor-intensive step in the process, which contributes to the overall cost of the project.
After the surface is sanded, it is ready for a fresh coat of paint or stain. A pro will typically apply several coats of each, letting it dry in between. Some finishes require more work to achieve a smooth finish, and some stains resist fading better than others. The type of finish you choose can impact your overall price as well.
In addition to refinishing, some homeowners choose to add custom features like glazing or shellac for a unique look. This can increase the cost of your project, as can additional projects that you may be completing at the same time. Since your kitchen will be out of commission during this process, it is a good opportunity to install a new backsplash or replace appliances, for example.
Another option is to reface your cabinets, which involves swapping out the existing cabinet doors and drawer fronts for new ones. This is often done when the layout of your cabinets is functional but you’re not happy with the style of your doors or hardware. Cabinet refacing is typically more expensive than refinishing because it includes the costs of new doors and drawer fronts as well as new hardware and a veneer applied to the cabinet boxes. Some experts recommend that you budget between $4,000 and $9,500 for this project.
Preparation
The preparation of your cabinet painting job is critical for a great result. First, make sure to empty your cabinets and label each one so that you can reinstall them in the proper order. This will save you from having to re-do any work because of a mismatched door or drawer. Remove the hardware, too, and put it in a bag or bin so you don’t lose any small parts. Next, you’ll want to sand the cabinet doors, drawers and frames to prepare them for primer. Use a coarse grit sandpaper to give the primer something to grip on. After sanding, wipe down the surfaces and vacuum any sanding dust to get a clean surface ready for paint.
Finally, you’ll need to apply a stain blocking primer to all surfaces of your cabinets before moving on to painting. This will help to block any future stains and it will also provide a good base coat for your new finish. Use a quality stain blocker such as General Finishes Water borne Stain Blocker. Once the primer is dry, you’re ready to start painting! Remember to tape off any areas where you don’t want to get paint on. You’ll also need to remove the adjustable shelves and hang them on sawhorses so that you can paint them separately. This will also help to speed up the process as you won’t have to wait for each surface to dry before moving on.
While the thought of refinishing your cabinets can seem overwhelming, it’s an environmentally conscious option that will save you money and allow you to completely customize your kitchen. Keep in mind, though, that refinishing is not a good choice for cabinets made of MDF or other composite materials that are not suitable for staining. If you’re considering refacing your cabinets, you should consider getting an expert opinion to make sure that it’s the right decision for you.
Refacing is a much more extensive project that involves removing and replacing the existing cabinet doors and hardware, as well as the hinges and drawer guides. It’s important to understand the difference between refacing and refinishing before starting your project, as both can be quite costly.
Painting
A new coat of paint can breathe new life into cabinets and add to the aesthetic of your kitchen. Using a high-quality paint with a primer sealer ensures the surface will be properly bonded for a long-lasting and durable finish. It’s best to apply two quality coats of oil-based or water-based paint. You can use a foam sleeve mini roller for flat surfaces, and a brush for edges and detailed areas. If you are unsure what type of paint is best for your cabinetry, consult a professional.
Thoroughly clean the cabinet surfaces to remove any grease, dirt, or grime that has accumulated on the wood over time. If necessary, you can scrub the cabinets with a degreaser solution, such as trisodium phosphate (TSP), available at hardware and paint stores. Open windows for ventilation and wear safety gear when using a chemical degreaser. Rinse and dry all cabinet surfaces thoroughly.
Prior to painting, lightly sand the surfaces with medium-grit sandpaper. Sanding removes the existing finish, roughens the wood, and creates a smooth surface for the new paint. Wipe away the dust and use a cloth to clear any remaining debris.
After sanding, a light dusting of powdered wood filler can be used to repair any scratches or gouges in the cabinetry. Once the wood filler has dried, sand again and wipe down with a cloth. Then, a wood conditioner can be applied to prepare the surface for staining.
Stains are a great way to enhance the natural grain of your cabinets and can provide rich color tones for a more updated look. However, stains only work well on natural wood doors and drawer fronts, not MDF or HDF. It’s also important to properly prepare the surface for staining, as stains cannot be applied over top of a finish or paint. Before staining, sand the surface with medium-grit sandpaper and wipe the wood down to remove any loose particles and to roughen it slightly. Then, you can sand again with fine-grit sandpaper and wipe away any remaining residue. A polyurethane or lacquer can be used to protect the sanded wood and give it a shine.
Finishing
Refinishing cabinets is an easy DIY project that can give your kitchen a new look and save you the cost of replacing your cabinets. However, there are some things that you should know before you do it. First, you should strip your cabinets before refinishing them. This is done by applying gel stripper with a paintbrush to one or two cabinet/door sets at a time. After waiting 10 minutes, scrape the old finish off with a scraper in the direction of the grain. You should wear gloves and work in a well-ventilated area. After you’ve removed the old varnish, wipe down the surface with a rag dipped in mineral spirits to remove any remaining stripper.
Once the wood is clean, you can sand it to smooth surfaces or repair scratches, gouges and other damage. After sanding, you should apply a good primer to help the paint adhere to the wood. A good primer will also help minimize flaking and peeling later on. Finally, you should sand the primer again to smooth out any bumps or grooves. Once you’ve finished sanding, you should wipe the cabinet down with a tack cloth and vacuum it again.
Next, you’ll need to choose a finish. Most professionals prefer to use a catalyzed lacquer because it dries quickly, is durable and easy to clean up. It can last for years, but it will yellow over time – much more slowly than varnish or Nitro.
If you want a more modern look, consider using a polyurethane. It’s quicker to dry and is more durable than acrylic. It can also withstand moisture and grease, making it perfect for kitchen cabinets.
Once you’ve chosen a finish, apply it to your cabinet doors and drawer fronts. Then, you can install new hardware and enjoy your newly refinished kitchen. While it can be a time-consuming project, it can save you the cost of buying new cabinets and will help to improve your home’s value. When choosing a contractor, be sure to ask about their experience with refinishing cabinets. You should also request references.